Components needed for this lab:
- push-button momentary switch
- (1) 1-k resistor
- (1) 10-k resistor
- several hook-up wires
Discussion:
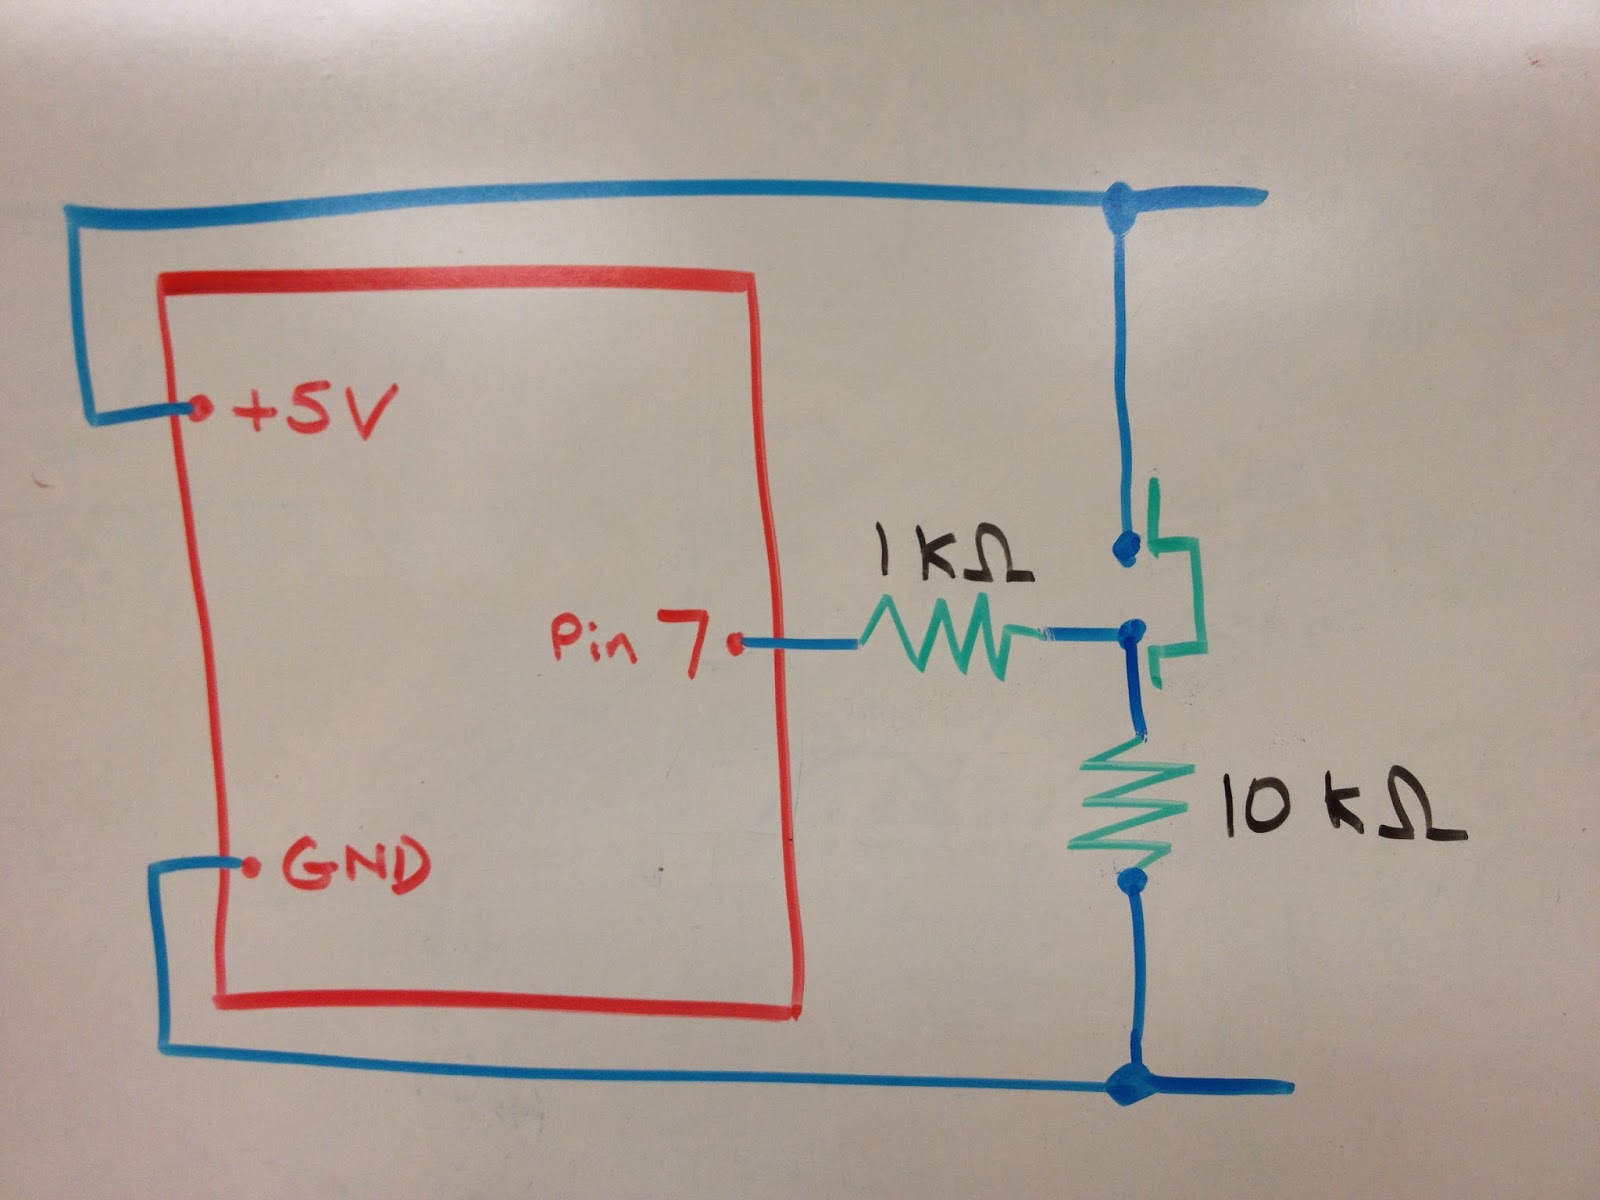
- Use the diagram above to build the circuit with the button
- In this case, the 10-k resistor is called a "pull-down" resistor because it normally "pulls" pin 7 to ground. The default "reading" of pin 7 will be LOW since it is connected to ground.
- When the button is depressed, pin 7 is also connected to +5 volts. Since the button itself offers almost zero resistance, pin 7 is "closer" to 5 V than ground, and so it will read "HIGH".
- Notice that when the button is depressed, the +5-volt rail is connected to the ground rail and current will flow between the two. That's why it is imperative to use a fairly large (in this case, a 10-k) resistor--we don't want too much current flowing in that branch of the circuit, overheating the button, and possibly burning out the pins of our Arduino!
- Once everything's connected, copy and upload the following sketch:
- Try it out. Does everything work?
- Show your working project to Mr. Bearss before continuing.
Going Further:
- Notice that we've made some significant improvements in our switch design over the past few days--this switch has completely eliminated the "floating" problem we encountered where the input value was neither LOW or HIGH.
- However, the switch is still not quite right as it is. In most applications, we don't want to be required to hold down the button to get the device to do something. Rather, we want the switch to act as a toggle: it should turn on an action when it is first pressed, and then turn off that action when it is pressed again.
- To make our switch act as a toggle, we'll need to introduce a few new variables. The basic outline of the sketch will be:
- Define variables and pin behavior
- Compare the new "state" of the button to the "old" state of the button to see if it has just been pressed.
- If the button has just been pressed, we will toggle the behavior of the LED.
- Update the "old" state of the button to its current state and repeat.
- Copy and upload the following sketch:
- Try it out. Does everything work?
- Show your working project to Mr. Bearss.